He bought it, he broke it (OK; maybe it was broke already…) and now he’s nearly fixed it. Steve The Toaster finally gets his Sunbeam going again. Was it easy? Was it ‘eck as like…
One of the major pitfalls of disassembling engines is they refuse to self-reassemble. A nightmare, ’tis true. Also, the cheapest way to get the damnable things back together is to do it yourself. Once more, I have failed to win the lottery, so on my return from Stewart Engineering, who had completed the refurbishment of my Sunbeam’s parts, I had no choice; time to get grubby!
One of the vagaries of the S8 motor is the method of attaining the correct crank end-float value. This is achieved by either removing bearing material from the rear main bearing (in the case of no float at all), or packing it out to move it forward (in the case of too much end float) with something referred to as ‘shim steel’. Happily, my S8 required the latter, as the chances of removing the correct amount and then successfully cleaning off all the grit were a zillion to one.
Indeed, (with much help from Will C) having drifted the front outer race into place, we had around 14 to 15-thou where we should have had 5 to 7. So, cut out a circle of 8-thou shim steel and insert behind bearing. Hah! How are you supposed get the bearing moved forward in its mounting plate so as to insert it? EVguru made up the necessary puller from some lumps of metal he ‘just happened to have lying around’ and thanks to the wonder of his well equipped workshop a small ‘Hey Presto’ was performed and said shim was duly in!
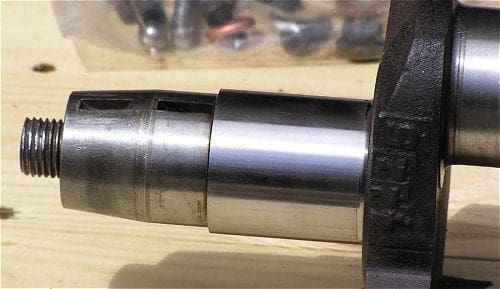
It always seems to me that every step forward is accompanied by half a step back. One of the threads which hold the studs for mounting of said plate chose this moment to retire from useful service. ‘Stripped’ is what I mean. So out with the crank again, and off to RJM on the Divvie, with crankcase trying to jump out of the top box, for a quick helicoil service. Not only did he have one, but he did it on the spot; a reasonable success, no less.
With the crank once again firmly fixed into place, the next items on the agenda were the conrods and pistons. The fun part of this was getting the big end nuts done up to the correct torque (25ft/lb) with the split-pin hole clear. Much swapping of nuts ensued, but only one would play ball. Filing the bottom of the nuts is the only way around this; so small amounts of metal were removed until the flipping things would line up perfectly, as the torque wrench snapped its approval at the required setting. This took an entire afternoon!
What more could possibly go wrong now? (You may well ask).
Surprisingly, it was my own stupidity (no! I can hear you shout — but it’s true…) which led to the next problem. After fitting the half-time gear that drives the camshaft (at half crank speed, you’ll be surprised to hear) and the corresponding crank gear and oil pump, the next major step was to fit the cylinder head (complete with camshaft still attached) and then add to that the camshaft gear, which is driven by a chain from the half-time gear. Lord knows why Mr Poppe, the bike’s designer, decided to use a chain inside the engine of a shaft drive bike, instead of an idler gear, but use it he did.
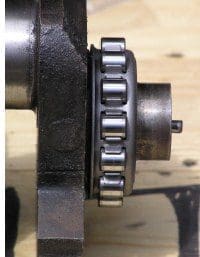 Timing this up is a piece of the proverbial pie. You put the crank at TDC, line up the camshaft with the hole at the top, slip the sprocket inside the chain and pop it onto the camshaft making sure the peg goes onto the hole. Facing forwards, that is, towards the camshaft.
If you have any idea what drove me to fit the stupid thing on the wrong way around, then please either keep it to yourself or pass it onto those very nice men in the white coats.
After confidently completing this, the next steps were to set the valve clearances, refit the cam cover with new gasket, then attach the clutch and the gearbox too. Hold on there, partner, new clutch nuts required!
Another dash to Ray’s at RJM and the correct nuts and locking washers were acquired. Then that nice, long-suffering Will C was enlisted to sling the motor back into the frame from whence it came. By the deft use of magical blocks of wood, leverage (and no small amount of grunting), the whole shebang suddenly found itself back inside the double loop cradle. At this point, Will (also magically) disappeared leaving me to ‘just’ (a word that is to cause much suffering) ‘finish off’ (as he euphemistically put it) the odds and ends.
Funnily enough, there really isn’t that much to do at this point – there are several ancillary parts to refit, none of which should really cause much of a headache. What on earth could be so difficult (after assembling a whole engine) as to cause me to wish I were strong enough to lift it into our wheelie bin?
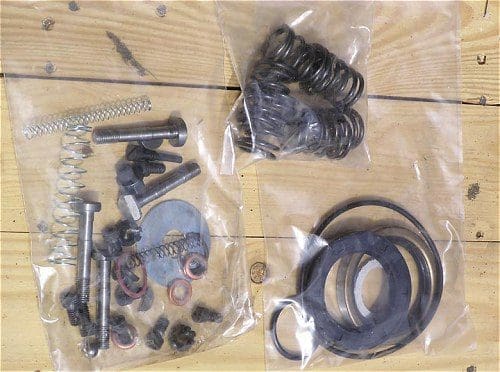
In a word or three: ‘nuts and bolts’.
There’s no great magic to these simple items, and on a bike that has never been disturbed before, it does not usually cause much of a problem. However, on a 54-year-old blunderbuss that everyone and his maiden aunt have had to bits, it becomes a nightmare!
The strange mix of threads, for one, is enough to cause much consternation. The sump, for instance, is held on by a good many nuts. Around a dozen, in fact. No, nowhere could I find a pot with a dozen or so nuts of the same size. It took an hour to sort that one out. In fact, the next five hours of the rebuild were spent matching nuts to bolts or studs correctly, and about thirty minutes of this time was actual assembly. I had decided to refit the distributor last, as they are rarer than hen’s teeth and fragile to boot. My reasoning was thus: while fitting everything else, it was safe on the workbench, especially while fitting the awkward electrics box and battery box.
Sensible, no? No.
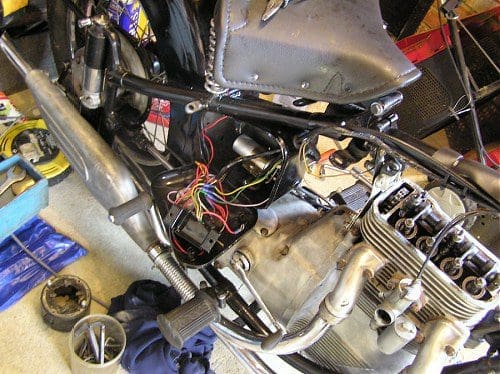
So, with exhaust in place, shaft drive attached, eleccy boxes affixed, carb and snubbers (rubber engine dampers) fitted, it was all down to the fateful distributor for the penultimate act, only to be followed by the petrol tank itself.
So why could I not fit the distributor into its recess?
I made sure that the peg on the driven end lined up with the hole perfectly. In it slipped, but, alas, not all the way; it was clearly fouling on something so as not to seat on its gasket by a good tenth of an inch. I tried and tried and tried again, but to no avail. It just wasn’t going in. Aagh.
So, removing it once more, I peer into the hole… What’s that in there? I can see the hole where the peg goes in, but what’s that peg on the sprocket doing sticking out? Oh yes, I’ve fitted the dear little thing on the wrong way around. Pegs facing backwards should be facing forwards, nurse. This, dear patient reader, is what we call a senior moment. A quick check with several aficionados reveals my worst nightmare. I have to turn the sprocket around.
Why several aficionados? Was I hoping that one would say ‘Oh it’s fine, just pack the distributor out with a thicker gasket’? No, I knew the awful truth, but my punishment for such an appalling cock-up was to be told by as many people as possible I’d been a Silly Billy. No sweat, I can do this. (There follows that ‘swallowing-squeak’ sound that Jerry Mouse used to make when cornered by Tom that Cat in that wonderful cartoon directed by Fred Quimby).
One of the main requirements for setting the camshaft timing was to set the crank at TDC. Easy when the gearbox is not fitted. Bloody impossible when it is – as well as the electric boxes which obscure the view too! This has to be exact TDC – not a fraction either way will do… First, remove the fiddly battery box (a dozen nuts and bolts that also hold the CMES voltage regulator and ignition coil in the other box that the battery box is attached to…) and then having removed the little cover at the top of the clutch bell housing, you can almost see the TDC mark. Almost. By poking a screwdriver down a spark plug hole onto the top of a piston, it was possible to guesstimate where TDC was occurring.
So I removed the cam cover, wrecking the nice new gasket in the process, and it was then possible by use of screwdrivers to lower the sprocket and extract it after slipping the chain off. Said sprocket was then re-inserted (although, perhaps, just maybe, not where it should have been) the correct way around and the chain was just (what a wonderful word – ‘just’ – makes it all sound so easy) popped back onto the sprocket and just (oops! There it is again) slipped around by a roller at a time until it was in the correct position.
Many thanks are due to the wonderful Emm whose patience and the almost permanent loss of several fingers enabled the correct camshaft timing to be achieved.
A day is a day and we decided to call it one. Match abandoned, we cleared up and I brought the cam cover inside to cut a new gasket out of that famous gasket-ripper’s standby, the dreaded cornflake packet. In this case, it was actually Frosted Shreddies, with a picture of the Incredible Hulk on it to stand on temporary duty until a new one from Stewarts could arrive. How fitting…
So Thursday arrives, and we are due to go to London Colney for the evening meet with the Busy Bee club. I made an early start (well, early for me) and soon had the electric box replaced. Goodness, I really hate ignition coil clamps… The new gasket was glued into place with Shellac (the gasket glue of the future for me) and the last bits were assembled. With spark plug caps in place, distributor bolted on in roughly the middle of its range of movement, there remained only the petrol tank to fit in order that kicking it might be attempted. That is, kicking it over with a view to starting, as opposed to kicking the whole thing over onto its side. Although…
Carb flooded, ignition on, a squirt of petrol from the can straight into the carb and kick. Kick again, followed by a ‘phut’. Another squirt of petrol, another kick and another ‘phut’. One more kick.
And a loud PHUT followed by a thrumming noise.
Goodness gracious me, it’s running… you could have knocked me down with a wrecking ball. Why I stood there with mouth open wide, I have no idea. Perhaps, in my own lack of confidence, I never expected it to run; but run it did. I switched it off, then back on and kicked it again. It started again. Wow. I let it warm up, made sure both warning lights were out, and stood there scratching my head. A face appeared with coffee in hand.
‘Well, you’ve done it then.’
I suppose I had.
‘Are you pleased? You should be’.
I suppose I should. It’s been a few years since I’ve rebuilt an engine (well over 20 I think; 750-four Honda) and I was at a bit of a loss what to do next.
It ran for about five minutes, with me stopping and starting it several times in the process just to make sure. Then I popped it off its stand and rode it up the road. Four gears, working clutch, and reasonable smoothness. I noticed that the front tyre was not seated properly on its rim, causing it to hop up and down. The simple fix for this is to deflate it, wipe washing-up liquid diluted with water around the bead (having squeezed it off the rim) and re-inflate to about 50psi. It should pop up OK. (Remember to deflate it back to normal running pressure, kiddies, if attempting this at home!).
Of course, once the tyre was deflated the Halford’s electric pump’s valve fitting chose this moment to break, just as 20psi was reached. So with a semi-flat tyre, I rode the quarter-mile to the nearest garage and for the princely sum of 20p popped it up to 50psi and the bead seated perfectly.
The ride back was exhilarating — right up to the moment when the S8 stopped. It would run, but only at tickover. It rolled most of the last 200 yards home, clutch in, and I only had to push it across the road. A quick check around showed the most likely culprit to be the contact breaker points, as everything else seemed fine. These are impossible to see, so I elected to whip the distributor out – after all, I was getting quite adept at this by now. Sure enough, a points gap of three-thou was not enough, so quick adjustment and once more a happy motor.
At this point, Will C, whom I had pleaded with the day before to assist in re-setting the camshaft timing, rang to say he was now available to do so. Smugly, I invited him to come and lend a hand. Frantic spannering ensued; I was determined to have the final pieces, air filter cover etc attached when he arrived. As his MZ puttered into the drive, I smiled broadly and his eyes fell onto the complete Sunbeam. True, I expected someone of his massive experience to find the odd thing wrong, which he did, bless him. Will’s knowledge of all thing motorcycle and all people from motorcycling backgrounds is little short of legendary. A couple of hours of his assisted fettling saw the last remaining niggles sorted out, and then he bade farewell, allowing us to ready ourselves for a slow ride out to celebrate the finish of the rebuild.
And then the rain started. Undeterred, we set off in a monsoon. The first stop to allow the Sunbeam to cool down was a burger bar in Luton. By the time we arrived there, it was chucking it down like stair rods and the Sunbeam was misfiring as the leads shorted out, leading to lunatic motorists almost running us down every ten seconds. Add to this the skid-master tyres, our lives were in constant danger. Discretion being the better part of valour, we had our dinner, and headed for home. Running-in a freshly built motor is not best done under such conditions. Tomorrow promised to be a better, dryer day. Would it start so readily in the morning as it did that day? Did I sleep at all, in stark anticipation?
Surprisingly, the answer to most of those questions (apart from the sleeping one) was yes. Indeed the S8 continues to start easily, even when ignored for a couple of weeks. Now the final replacement gaskets have arrived along with a cover that was missing and had been replaced by a plain cover, the bike is more original than ever. It’s fun to ride but always makes me late wherever I go as I never manage to go anywhere without having to chat with someone about it.
It has been immense fun to rebuild, and I have made many friends along the way. Should you buy one? Yes, but do bear in mind it is not as fast as some other 500 twins, although it does have that shaft drive benefit.
I would like to thank the following folk for their immense help along the way:
Will C, AJSBSA, the 3 Paul’s, EVguru, CB350 & G80, and Barry, and mostly Emm, of course, for piggy-bank raiding, spannering, brow mopping, coffee, bacon sarnies as well as mental and physical support!
People To Speak To
Stewart Engineering
Sunbeam Enthusiast Site
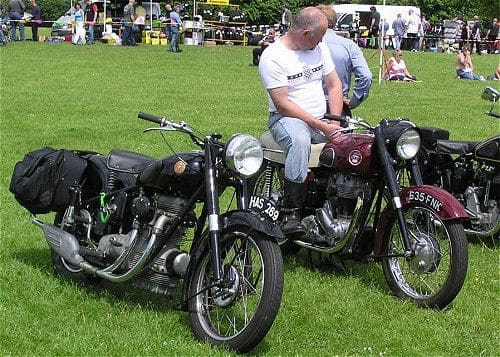
Is it really finished?


