“I thought that restoring something old may be what I needed” said Kim Henry, before starting the rebuild of his Real Classic Kawasaki…
About 12 years ago I noticed an ad in the local newspaper to sell a BSA 650 look alike that didn’t cost as much as the real thing. I was talking to a mate, John, about it and we decided that seeing as neither of us could afford a bike, we could afford to buy it between us. Things were tight for both of us at that time. (my, how things can change in 12 years). We went to look at it and sure enough it appealed even though the gearbox was broken and it had recently caught fire, everything was there and it was almost rideable.
Enjoy more classic motorcycle reading, Click here to subscribe to one of our leading magazines.
We proudly took it home to John’s house and started to effect a quick makeover so that we could use it. All that was really needed was to get a broken gear selector welded by a local motorbike nut, put a new battery in and give it a quick paint and a bit of sign work. We were looking for the Brit bike look from the 60’s so used green and cream for the colours and a retro style of lettering. The finished result is to be seen below…
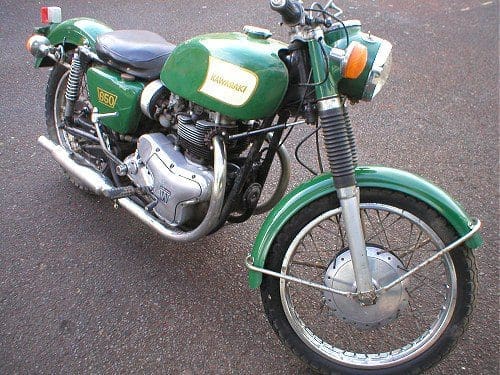
We both used the bike for a year or two, but as my financial situation moved from uni student to full time government employee, I soon found another bike – a Guzzi 1000 I Convert. After I had finished with that and bought a BMW K75, we decided that John would buy my share of the W1 and he planned to do a proper restoration. This became the typical story of never enough time or money and John used the bike a little for a couple of more seasons before letting the registration lapse and the bike sat in a corner of his garage.
I kept on buying and selling ’till finances allowed me to buy almost any bike I wished, so I opted for the one that promised everything I thought I wanted – a BMW R850R. Right size, fairly new, factory luggage, intercom, screen, just right for me. Wrong. I hardly had time to use it that summer and the fact that it cost more than any vehicle I had ever owned till then by about 4 times had me wondering if I had made the right choice. I guess I had to go through that one to know.
So, I sold the fabulous BMW and wondered just what would the right bike be for me. I wondered about the W1 650 loitering in John’s garage and I thought that restoring something old may be what I needed. We talked about it for a while and he agreed that something should happen with the old bike, so money changed hands and I took it away.
 |
Classic Kawasaki Stuff on eBay.co.uk |
First the strip down. All the painted bits and the parts with flaking chrome – and there were a few of these – came off. I dismantled the wheels after making a spoke pattern and taking lots of pictures – a digital camera is great for this, being instant and giving the chance to take lots of shots. The hubs had been painted and there were a lot of drips of paint on the spokes so I decided that these could go to the chrome shop along with the rest of the bits and could get polished by people who knew what they were doing.
Reference to a few pictures from the web helped me to know what needed to be chromed as the bike in original police guise had a lot of parts painted that would otherwise have had the bright shiny stuff on them. With all those parts off at the chrome works, I set about stripping the paint. It takes a fair few applications of stripper to get all paint off and I spent a few cold hours outside getting the goop off – the smell will take nose lining off too so outside was the only place to work.
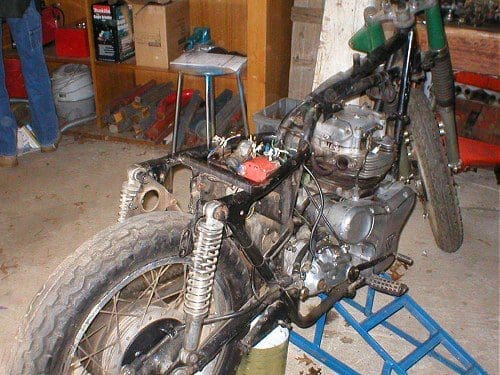
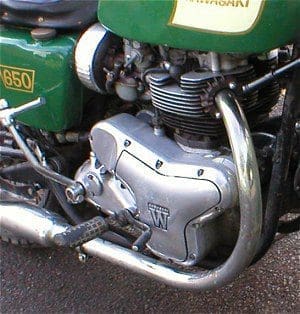
The engine and gearbox were left in the frame, partly because I’m chicken and didn’t want to get too heavily involved with the mechanical side (many past disasters in the background here) and also because the basic mechanicals were in pretty good shape.
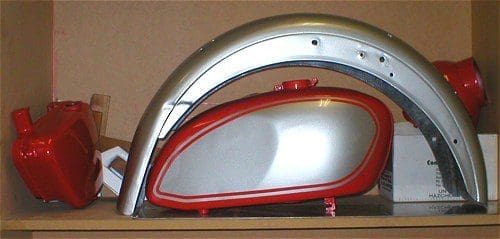
I have most of the equipment needed to apply paint so I intended to do this work myself but experience has shown me that you need a perfect base for a perfect paint job so I decided to send the tank, oil tank and side cover to the panel beaters for the base work.
The tank was to be painted because of the cost of straightening out a dent I put in it by letting the bike fall onto my front fence years back and the price to have it chromed could have been as much as AUD$500 (one third the cost of the bike from John!) It was a pity because a chrome and paint job is very much the look of a 60’s bike but a compromise was needed, so when looking through a magazine of modern bikes I saw the new Triumphs had painted guards and a two-tone tank in silver and something, I realised that this would do the job for me for now. With a bit of care and some paint from the Australia Post colour chart, I feel that the end result works quite well.
About this time the parts were ready to be collected from the chrome shop – the rims, chain guard, fork bottoms and top covers, front guard and stays, rear guard stays, exhaust pipes, front brake air scoop and the polished front and rear hubs. When I got home and said, sheepishly, to my wife that I had just broken the budget, she asked “how much? $200? $300?”
Errr, how does anyone comfortably deal with this sort of situation? I figured that the only way was to BLURT so I said “how’s $1,480 sound?” And to her credit she replied (after only the shortest stunned moment) “well, I suppose it had to be done.” She’s a top girl for sure, and I bet there are a few fellers out there who wish they had one just like her.
