Wherein Jim Algar discover the pitfalls of working on a classic bike that has spent almost 50 years in the hands of… other people…
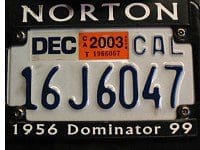 I stood in my garage looking at the bike…well, not so much a bike as a collection of parts and bits on the white plastic shelving at the back of the garage. My eye went to the number plate, still bearing the registration sticker that I had issued by my local DMV when I bought the bike. 2003, it says, somewhat to my embarrassment. Almost three years on, and I’m still working on this project. Must speak to someone about that.
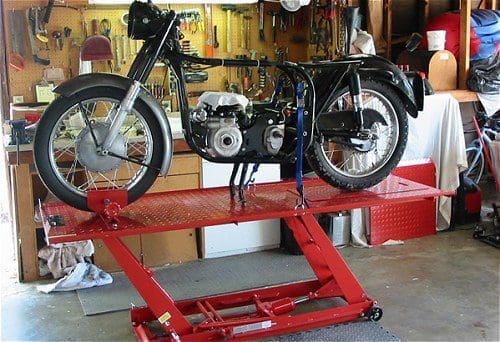
All right, back to it. Since my last Diary entry, I have indulged myself with the purchase of a hydraulic lift. Absolute joy, and if you’ve ever given the slightest thought to owning one, let me urge you to give in to the idea. Yes, they’re heavy. Yes, they do take up a fair amount of space. But they’re not that expensive, compared to what our joints and muscles are worth, especially since most of us aren’t teenagers any more. Well, not physically, anyway. Mentally… we can let our spouses speak to that.
So, where to start? My cylinder head has returned from Norvil (see Chapter 7), repaired, refreshed and beautifully bead blasted. But I’ve put it aside for the moment to concentrate on some rather more mundane tasks that need doing.
First up are the wheels: bearings and brakes, in particular. Here is where the OP (other people) factor really comes into play. Even if some other parts of the bike have escaped the heavy-handed ministrations of well-meaning previous owners, wheels and brakes have almost certainly been gotten at. They come under the heading of ‘routine maintenance’, and even folks who aren’t mechanically inclined seem willing to take a stab at such tasks. Which is how we all started on the road to developing our mechanical skills, such as they might be.
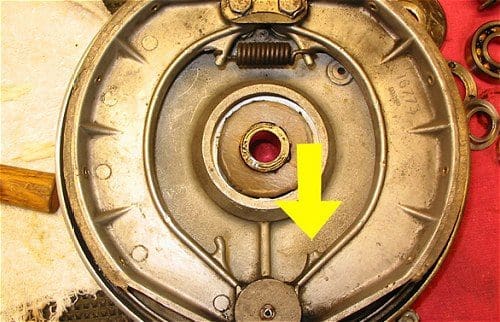
Well, I discover it’s anything but routine when I tear into my wheels. Front first, and imagine my surprise when I look at the front brake to discover that it’s missing one of the pair of brake springs. And why is the spring missing? Because the mounting tang on one of the brake shoes has broken off. Since neither the spring nor the broken tang fell out of the drum when I opened things up, the inescapable conclusion is that someone was content to ride the bike around in this condition. Yikes!
And it’s somewhat the same with the front wheel bearings. There’s a particular order and arrangement to the various bearings, washers, spacers and seals within the wheel hub, but that order and arrangement has not been followed, because some of the parts are not there, never mind out of sequence. Someone has cut a rather crude washer/spacer out of pasteboard (!) and shoved it into the hub, where it has utterly failed to accomplish the desired task. Tsk, tsk! So poring over exploded parts diagrams soon has me online again, placing an order.
Sad to say (surprise!), things aren’t much better at the rear wheel. Removing the brake drum/sprocket from the wheel reveals that one of its attaching studs has been well and truly stripped-and the other two aren’t much better. Dealing with that is going to take some figuring out.
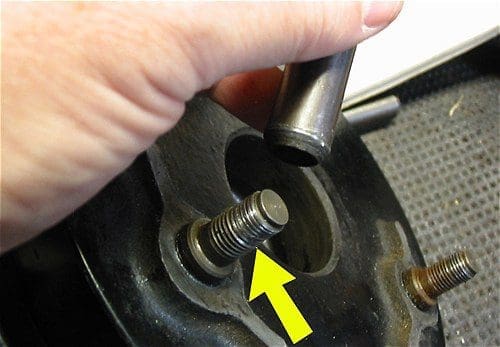
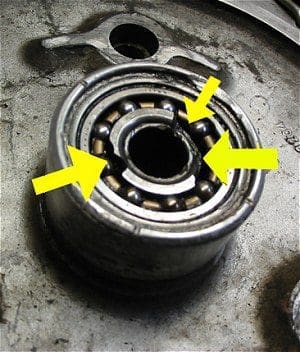
Moving to the wheel hub itself reveals a true horror; disregard for the proper order of seals and spacers (again) has led to the disintegration of the inner race of one of the wheel bearings. There are two ball bearings in the rear wheel; an inexpensive single row bearing on the right and a double row (read: expensive) example on the left/brake side. Care to guess which one was breaking up? Of course; prepare credit card.
 |
Random Norton Domi Bits on eBay.co.uk |
This time, though, the errant pieces do in fact fall out of the brake drum when I expose it to the light of day. Dispiriting, to say the least, but at least the wheel hub itself is not damaged, so I’m looking at parts that can be sourced and replaced without too much damage to the old bank card. I’m getting pretty good at studying exploded parts diagrams and translating the little figure numbers and pointing arrows into actual part numbers that can be ordered.
With wheels apart and awaiting parts, I turn my attention to the suspension. The rear shock absorbers are, by all accounts, somewhat rare, being Armstrongs rather than the more common Girling units. A couple of my reference books suggest that Armstrongs were fitted only in the years 1956 and 1957. A close examination of the units on my machine shows a stamping on the shock covers of January, 1956… spot on. So I’ve decided to keep them. They’re likely to be more than just a bit soft, given their age and the bike’s mileage (the odometer reads 34,194… which could be accurate or it could be a total fiction). If they’re a total disaster once the bike is back on the road, I’ll swap them out, but until then they’re still in the game.
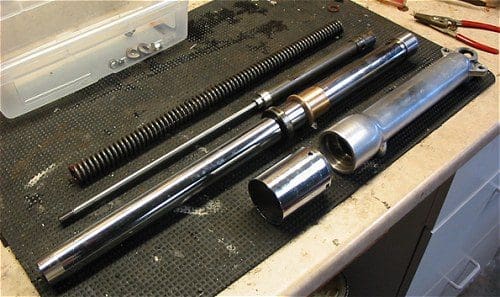
The front forks will get new bushings and oil seals, I’ve decided. Forks are another of those motorcycle parts that some folks find intimidating, and there’s a lot of jargon and mumbo-jumbo and dire cautions bandied about. But really, forks are not much more than a glorified tyre pump, moving oil instead of air, and if you’re willing to tear one down, you find there’s not that much to them. Oh, sure, you might not want to get into the workings of the tiny valves and orifices that control the fluid flow and thus the damping, but that’s not what normally needs attention.
With mine apart, everything appears to be in good shape, with only a little wear on one of the stanchions; not even through the hard chrome finish, more of just a slight color variation at the wear area. I easily swap out the bushings-two per leg, one on the stanchion and one in the slider-then the oil seal, and everything is easily back together. Putting the drain plugs back into the lower end of the forks, I discover that one of the slider drain holes is sporting a helicoil repair. This is in the slider that mates with the stanchion that showed just that infinitesimal amount of wear. Coincidence? Don’t think so. A helicoil repair suggests a stripped plug hole, which suggests a leak, which suggests that, if unnoticed, the oil level in that fork leg might have been allowed to go just a bit low. Something else to keep in mind when the bike is back on the road; watch that side for leaks, and check out the forks’ action to see if everything is sliding smoothly.
So… what next? Well, with the front and rear suspension off, I’m looking at a bare frame. After considerable thought, I’ve decided to take a crack at painting the frame myself. I’ve had success with the PJ1 ‘Gloss Black, Porcelain-Hard, Epoxy Paint’ that I’ve used on some of the smaller bits of the bike (see Chapter 7, again), so I’ll give it a try on the frame. First order of business is to cobble together some sort of frame stand that will hold the frame up off the ground and give me access to all parts of it with the PJ1 aerosol can. Such a stand would be a single-purpose, one-time-use affair, so I don’t want to spend much time or money on it. So, a quick $10 in hardware from my DIY store, plus some left-over plastic irrigation pipe from a past garden project, and about 20 minutes work, and voila…paint stand. The frame attaches in the front leg of the stand through the front motor mount, and at the rear through the swinging arm attachment holes. By undoing the front mount, the fame can be tilted back to give access to the undersides of the various frame tubes. Cheap and cheerful…
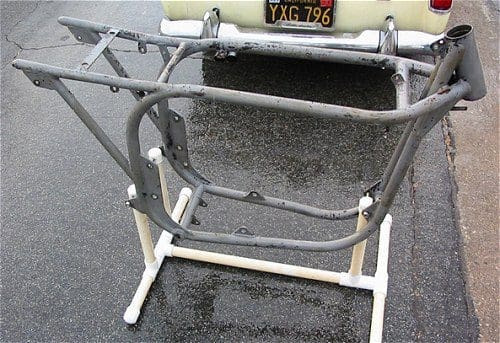
Assaulting the frame with massive amounts of paint stripper soon has it down to bare metal, allowing a close examination of the frame’s condition. Not too bad for a fifty-year-old collection of steel tubing. There are some small scrapes and dings, but nothing alarming-except on the very bottom of the lower frame tubes. On both of them, the paint stripper has exposed an area of brazing-the tell-tale brass coloring is unmistakable-just where the ‘ears’ of the centre stand bear on the lower frame tubes when the bike is up on the stand. Obviously, the tubes have been dented, allowing the stand to go too far forward, making the bike less than stable when on the stand, and someone has attempted to remedy this by building up the dented areas by brazing.
This denting is common, and is partly the inescapable result of the bike being heaved up on the stand many, many times over its lifetime, but an even more likely cause was some previous owner whose preferred method of starting the bike was with it up on the stand. Add the rider’s weight to the weight of the bike, and throw in the downward force of heavy attacks on the kickstarter, and the result is predictable, and unfortunate: dented frame tubes. The brazing, being softer than welding, is already started to wear from the stand ears, but I think, all-in-all, that I can live with it.
So all that’s left at this point is to paint the frame… if only the weather would warm up a bit. The PJ1 can says that 70 degree F (21C) is the minimum temperature for painting, and our California weather is not cooperating (don’t believe everything you read in your guide books!). So I must bide my time, and wait for Mother Nature to take notice. Stay tuned…


